
Pendant Light Size Guide: Diameter, Height & Fit
In brief
Use the surface below to choose a starting width. Use ceiling height and your chosen clearance to plan the installed length, then check whether the fixture can achieve it.

Key takeaways
- For one pendant over a dining table, roughly half to two-thirds of the table width is a visual starting point.
- Compare the full assembled length from the ceiling mounting surface to the fixture bottom.
- Try candidate widths with a paper outline, then check body height and seated views separately.
- For several island pendants, choose shade width, number and spacing together.
Start with the space below
Choose a pendant for the area it needs to serve. A single light over a table has a different job from a bedside accent or a light in a walkway.
| Location | Measure first | Check before choosing |
|---|---|---|
| Dining table | Table width and ceiling height | Table proportions and seated views |
| Bedside or small area | Available width and distance to nearby furniture | Bedside movement and whether you can see the light source while sitting or lying on the pillow |
| Walking area | Ceiling height and space below the light | Walking route, doors and required clearance |
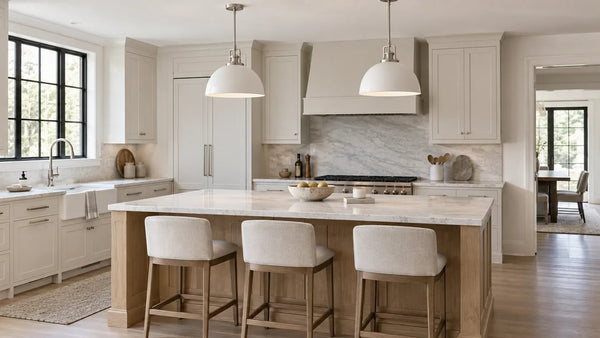
| Kitchen island with several lights | Island dimensions and mounting positions | Number, spacing and shade width together |
For a whole-room overview of purpose, shade and placement, start with our pendant lighting guide. Planning a row over an island? Use the island guide for layouts and spacing.
Choose a width that suits the surface
For one pendant over a dining table, compare fixtures around half to two-thirds of the table’s width as a visual starting point. Adjust for the shape and visual weight of the light, the table and the room; this is not a formula for each pendant in a row.
Measure the full outside edges, including any projecting details. Compare the dimensions that match the shape:
- Round: use the diameter.
- Oval or rectangular: compare both width and depth with the surface below.
Example: a 36-inch-wide round table
Half to two-thirds of 36 inches gives a starting range of approximately 18–24 inches. Compare the two ends of that range:
- 18 inches: leaves more visible table around the light for a quieter look.
- 24 inches: creates a stronger focal point above the table.
Choose the smaller width for a quieter outline or compare the larger width for a stronger focal point. Also consider body height, volume and the view from your seat; a solid shade may feel more prominent than an open design of the same width.
Try the widths before ordering:
- Cut a paper circle at each candidate diameter.
- Hold each outline at the planned position above the table, away from any light fitting.
- Compare it from the doorway and your usual seat, then check the fixture’s body height separately.
The paper circle shows horizontal width only. Check the fixture’s body height separately and consider its three-dimensional outline and seated sightlines.


Work out how far the pendant needs to hang
The installed hanging length is the distance from the ceiling mounting surface to the lowest point of the assembled light. It includes the fixture body and its suspension; it is different from the supplied cord length.
Above a dining table: A common starting point is 30–36 inches between the tabletop and the bottom of the light. Schoolhouse uses this range for a standard 8-foot ceiling; adjust for your sightline and fixture. Once you have chosen a gap, calculate the target installed length using your own measurements:
Target installed length = ceiling height − table height − desired gap above the table
Example: With a 96-inch ceiling, a 30-inch table and a chosen 32-inch table-to-fixture gap, the target is 96 − 30 − 32 = 34 inches. These are example measurements; choose a gap that works for your sightlines, furniture and the selected design.

Use our lighting size calculator to try your table dimensions and chosen hanging gap, then compare the result with the complete installed length.
In a walkway: Work from the ceiling height and the clearance you need below the fixture. That gives a maximum hanging length for your plan, rather than a target above furniture. Check the route, door swing and local requirements with your installer. Our hanging-height guide explains the differences between locations.
Compare the product with your plan
Compare your target or maximum length with the installed lengths the selected fixture can actually achieve. Then check the full width, body height, mounting arrangement and the view from the places you use.
| Product information | How to use it |
|---|---|
| Overall width and body height | Compare the outside dimensions with your paper outline and the space above the surface. |
| Installed lengths and adjustment | Check the shortest and longest assembled lengths and whether the adjustment method can achieve your target. Sectional rods offer specific combinations. If the shortest length exceeds your walkway limit, compare another fixture. |
| Mounting and sightlines | Check the mounting arrangement, doors and your usual views from the places you sit or walk. |
If dimensions are missing, ask for the selected variant’s assembled ceiling-to-lowest-point lengths and adjustment options.
For example, if your table plan calls for a 34-inch installed length and the shortest available length is 40 inches, that fixture cannot reach your chosen position. Revisit the placement and sightline or compare another model. Do not assume a fixed rod can be cut.
FAQs
Is there a standard pendant diameter?
No. For one pendant above a dining table, use the table width to find a starting range; for a bedside pendant, compare the smaller area it needs to serve.
Can I use a pendant with an 8-foot ceiling?
Often, yes. Over a table, compare the assembled hanging length with your chosen tabletop gap. In a walkway, check the clearance below the fixture.
What if the product page only lists cord length?
Ask for the shortest and longest fully assembled distances from the ceiling mounting surface to the fixture’s lowest point, including canopy and fixture body.
Can every adjustable pendant be shortened to any length?
Check the shortest assembled length and adjustment method. A cord fitting may need some cable remaining, while sectional rods offer specific combinations rather than every length between the minimum and maximum.
Should I choose a wide, shallow shade or a narrow, tall one?
A wide, shallow shade creates a stronger horizontal outline with less body height. A narrow, tall shade uses more vertical space. Compare both dimensions at your planned hanging position and check the view from your seat.
Sources
- Schoolhouse: choosing a dining-room chandelier or pendant — table proportions and the 30–36 in hanging-height starting range for an 8-foot ceiling.
- Lowe’s: pendant lighting buying guide — sizing and placement considerations.
You May Also Like
Back to How to Choose Pendant Lighting: Size, Shade and Placement
Comments
Have a question or a useful tip? Leave a comment below.